Some people have reported to me that the beloved Send an HTTP request (V1) under Office 365 groups that we used to easily call Microsoft Graph is not available anymore when creating new flows.
It turns out it has recently been deprecated, as stated by Microsoft, and we are recommended to use V2 instead:
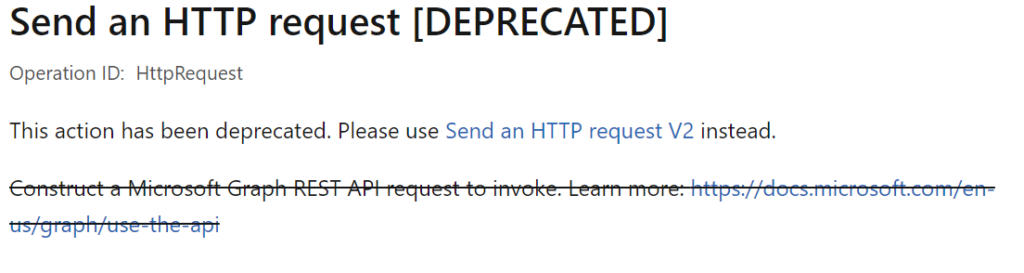
Unfortunately, the V2 action under the Office 365 Groups connector only supports the /groups endpoint and will not allow us to create planner plans.
The alternative
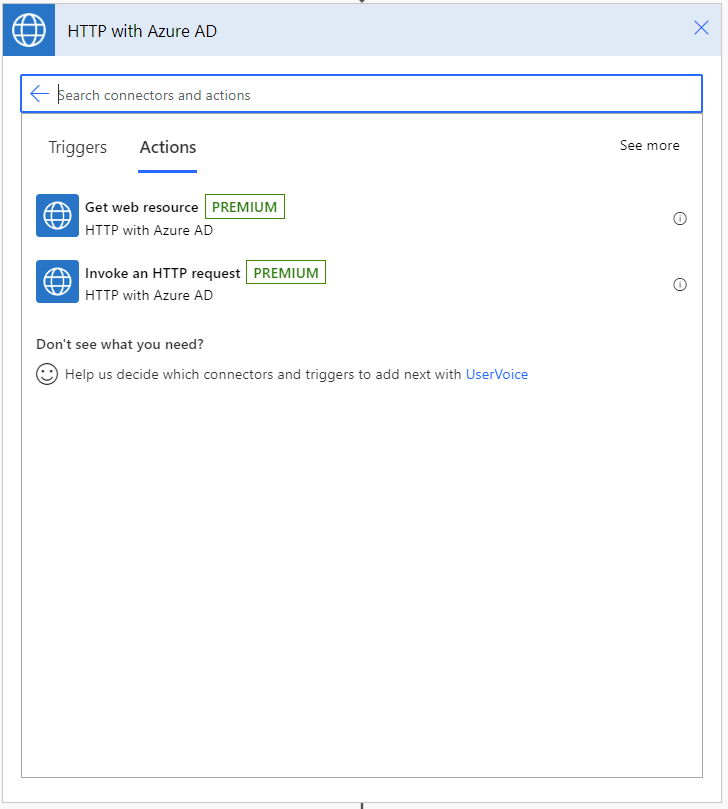
At the moment there is no alternative available with Standard licenses to call the Teams and Planner endpoints. However, we can use the ‘HTTP with Azure AD’ (which I believe that soon is going to be renamed to something related to ‘Microsoft Entra’ due to product naming change) connector to call Microsoft Graph, and create plans/teams tabs, if you have access to proper Power Automate licensing.
As in a previous example I wrote, let’s build the Flow to create a Planner Plan and add it as tab to the General channel of a Teams team, but this time, using this connector.
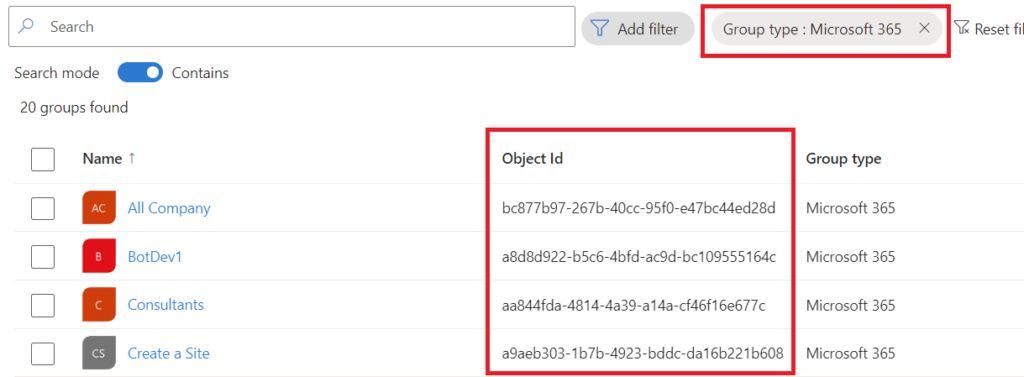
Step 1: Find your Team ID (Microsoft 365 Group ID)
Head over to the Azure Portal, and under Groups, filter by group type ‘Microsoft 365’ and find your group/team ID (Object Id):
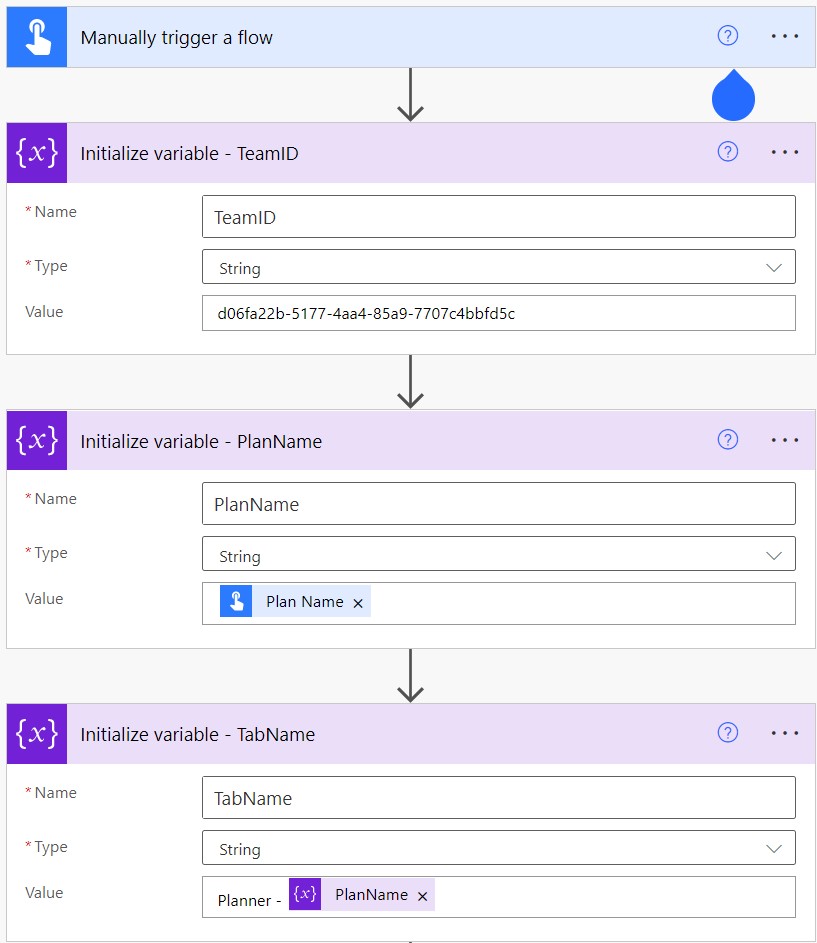
Step 2: Create the Flow
Create a manually Triggered flow having the Plan name input and also as a variable. Create another variable to store the Tab Name (in this case we concatenate ‘Planner – ‘ to the Plan name) and the Team ID (which you got from Azure):
Now we need to retrieve the ID of the General channel. For that, use the Teams connector to list all channels from the Team you chose, filter the channels by name to obtain the Id of the channel and save the result in a variable:
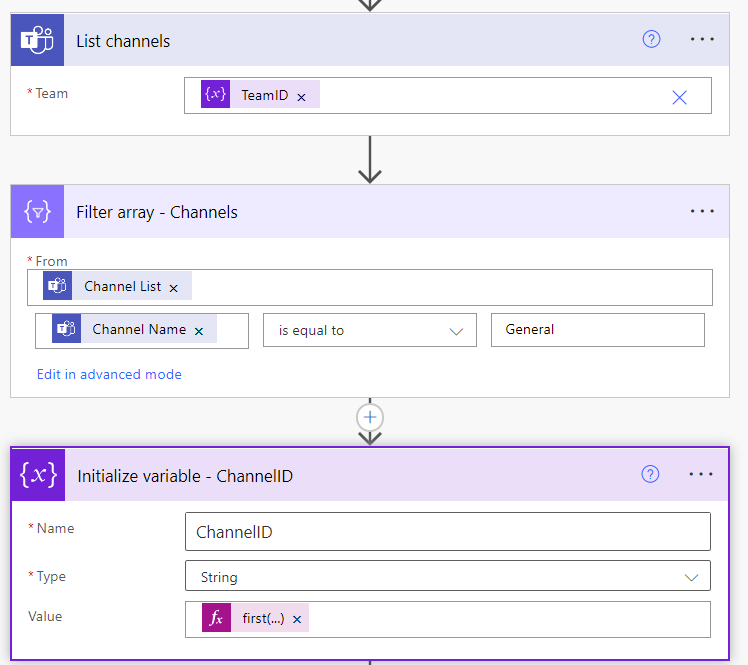
The formula for the Channel ID (First item from filtered results, considering a renamed Filter array action as above):
first(body('Filter_array_-_Channels'))['Id']3: Use the HTTP with Azure AD connector
In the actions list, search for ‘HTTP with Azure AD’ and click on the ‘Invoke an HTTP Request’ action. You will be prompted to provide details about the application you will be connecting to.
For Microsoft Graph you can simply use https://graph.microsoft.com as both ‘Base Resource URL’ and ‘Azure AD Resource’ URI.
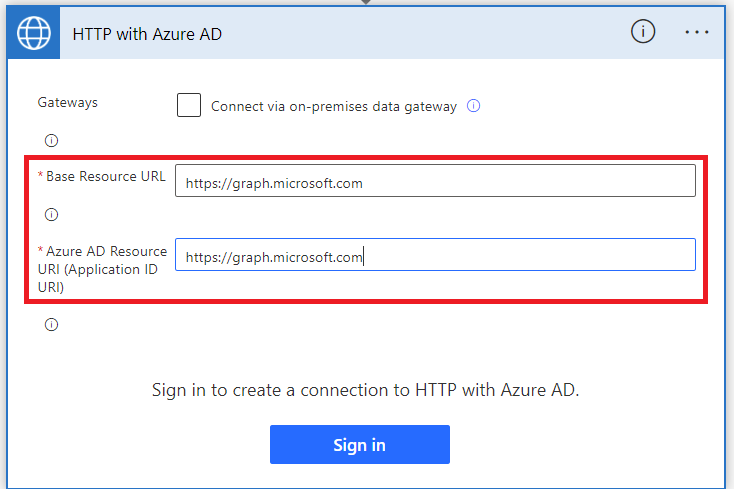
Click sign in to create the connection.
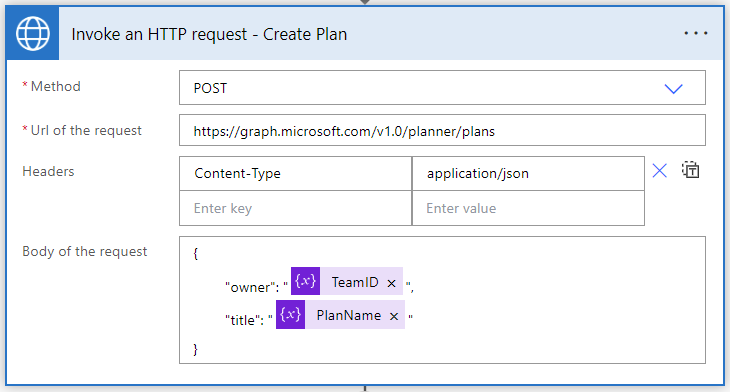
4: Creating the Plan and parsing the created plan data
To create the plan we run a post call to Microsoft Graph as below:
We can then parse the response using the ‘Parse JSON’ action to easily manipulate the results in the rest of the flow:
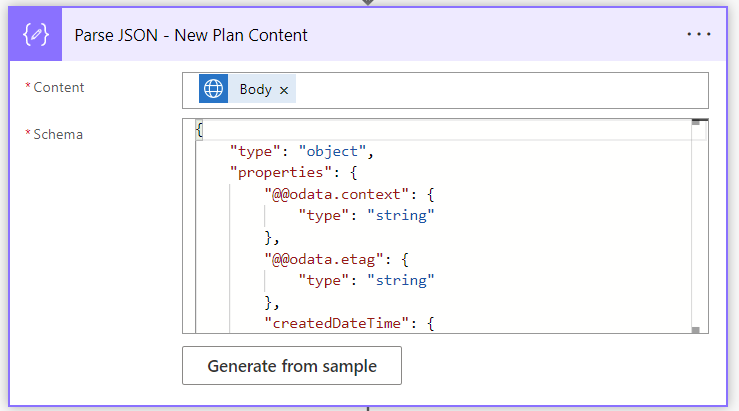
You can use the following schema to parse the Request Body:
{
"type": "object",
"properties": {
"@@odata.context": {
"type": "string"
},
"@@odata.etag": {
"type": "string"
},
"createdDateTime": {
"type": "string"
},
"owner": {
"type": "string"
},
"title": {
"type": "string"
},
"id": {
"type": "string",
"description": "The Plan ID"
},
"createdBy": {
"type": "object",
"properties": {
"user": {
"type": "object",
"properties": {
"displayName": {},
"id": {
"type": "string"
}
}
},
"application": {
"type": "object",
"properties": {
"displayName": {},
"id": {
"type": "string"
}
}
}
}
}
}
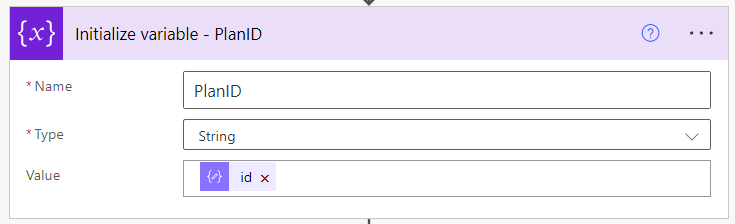
}Then save the plan ID in a variable as below:
5: Adding the Plan as a Teams a Tab
Now with the Plan ID, Team ID, and Channel ID in hands, you need run a POST request in the endpoint related to the team/channel/tabs you want to create the new tab, so that you add Planner as a tab to the General channel of the Team, and specify the Plan to use in that tab, as in the following image:

As long as that all the variables in your flow respect the names of the sample pictures above, you can copy the below code and paste into your ‘Invoke an HTTP request’ action’s body:
 {
            "displayName": "@{variables('TabName')}",
"teamsApp@odata.bind" : "https://graph.microsoft.com/v1.0/appCatalogs/teamsApps/com.microsoft.teamspace.tab.planner",
            "configuration": {
                "entityId": "tt.c_@{variables('ChannelID')}_p_@{variables('PlanID')}_h_@{guid()}",
                "contentUrl": "https://tasks.teams.microsoft.com/teamsui/{tid}/Home/PlannerFrame?page=7&auth_pvr=OrgId&auth_upn={userPrincipalName}&groupId={groupId}&planId=@{variables('PlanID')}&channelId={channelId}&entityId={entityId}&tid={tid}&userObjectId={userObjectId}&subEntityId={subEntityId}&sessionId={sessionId}&theme={theme}&mkt={locale}&ringId={ringId}&PlannerRouteHint={tid}",
                "removeUrl": "https://tasks.teams.microsoft.com/teamsui/{tid}/Home/PlannerFrame?page=13&auth_pvr=OrgId&auth_upn={userPrincipalName}&groupId={groupId}&planId=@{variables('PlanID')}&channelId={channelId}&entityId={entityId}&tid={tid}&userObjectId={userObjectId}&subEntityId={subEntityId}&sessionId={sessionId}&theme={theme}&mkt={locale}&ringId={ringId}&PlannerRouteHint={tid}",
                "websiteUrl": "https://tasks.office.com/{tid}/Home/PlanViews/@{variables('PlanID')}?Type=PlanLink&Channel=TeamsTab"
            }
        }
Results
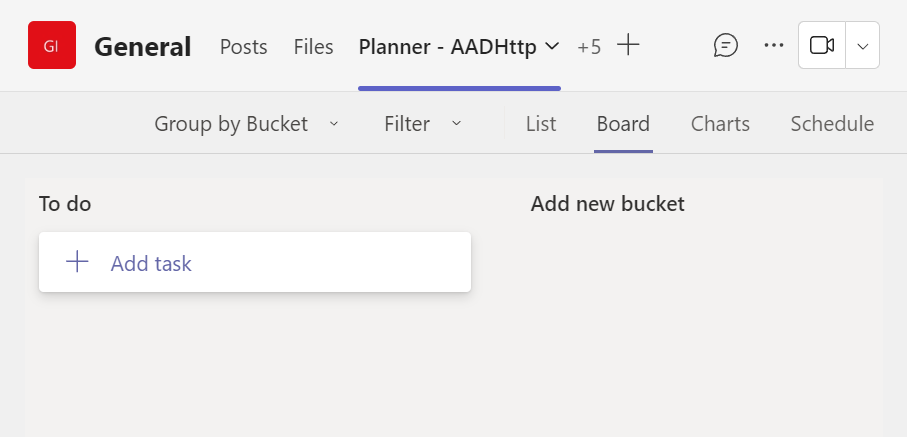
After running this Flow, a Plan will be added to the General tab of the specified team:
References
[…] Source link […]
Hey mate!
Thank you so much for the right up, I’m learning PA at the moment and this is fantastic.
Could you assist me though, I’m getting an error on the Initialize Variable: ChannelID part.
Error:
Correct to include a valid reference to ‘Filter_array_-_Channels’ for the input parameter(s) of action ‘Initialize_variable:_Channel_ID’.
Hey Chad, is your filter array action named exactly as on the screenshot? It needed to be in order to work properly
You’re a wizard. Totally going to attempt this, bash my head against my keyboard, swear, google some more, do 100 errors. But I will emergy VICTORIOUS. I have faith.
hi Michel, thanks for the post.
did you find a way to do that using standard license in Power Automate?
Hey Daniel,
This was possible a while ago, but unfortunately now only with Premium connectors. Graph API support on Standard connectors is limited to certain endpoints.
Got it to work. I tried to use it without a channel. Now my flow is creating a channel and it is working perfectly. Thx so much.
🙂
Thanks a lot for the article. but as of Feb 2024 can we do the same using none-premium connectors?
Thanks
As far as I am aware, it is currently possible only with Premium connectors.
Hello Michel, great to help us out by sharing your knowledge. I get stuck at the last step. Managed to create the planner plan but the JSON code for creating the tap en adding the created planner plan does something wrong. So now I end up with a planner tab containing a wrong URL and does not load correctly. Do I need to fill in all the ID’s in de last JSON code for {tid}, {userPrincipalName}, etc. or only add the correct ChannelID and PlanID? Thanks for helping.
Hey Bjorn, no the {tid} and {userPrincipalName} should be kept as is, maybe the issue is another parameter…
its not to happe with this
“https://graph.microsoft.com/v1.0/appCatalogs/teamsApps/com.microsoft.teamspace.tab.planner”
Throws Error
“Creating or updating tab configuration for app ‘com.microsoft.teamspace.tab.planner’ is not supported.”
Hello,
As reported by a few readers, the piece to add the plan as Tab does not work anymore, I will be posting updates if I find an alternative solution.
Hi Michel,
Thank you so much for the content, it has really helped me. I had a flow running since last November that worked great and created a planner tab in the channel. However, now instead of a tab with the planner for that teamsite, I get “My Tasks” as a tab. I’m GUESSING this is because of the new planner features being rolled out. I am enrolled in the new planner testing.
I have found the plan is still being created and can be added manually but I can’t seem to figure out what I need to change in the HTTP request that posts the tab. Any ideas? Thanks!
Hello, thanks for your feedback😊
As reported by a few readers, the piece to add the plan as Tab does not work anymore, I will be posting updates if I find an alternative solution.
everything worked except the add tab. I get the error Invalid bind property name teams App in request. I also tried beta instead of v1.0 but no succes.
Hello,
As reported by a few readers, the piece to add it as Tab does not work anymore, I will be posting updates if I find an alternative solution.
Hi Michel,
Thanks so much for putting this together! I’m working on automating our onboarding process and this has been a huge help. One issue I’m running into however is when I send the HTTP request to add the newly created Planner plan to the Teams channel tab, it’s adding every task assigned to me (My Tasks) and not the plan I created with the first HTTP request.
Hello, thanks for your feedback.
As reported by a few readers, the piece to add it as Tab does not work anymore, I will be posting updates if I find an alternative solution.
Thanks! for all the great detail. Relatively new to PA here and you are providing exactly what I need – I think (I don’t need to auto-add a tab to Teams). BUT… what rights/permissions must the account running the Power Automate flow have in your steps 3 and 4?
Hey the account needs to be a member of the Team where you are creating the Plans for this to work properly.
Hi,
Is there a way to make ‘Base Resource URL’ and ‘Azure AD Resource’ URI dynamic instead of a fixed URL? My situation is that I want to specify environment specific URLs.
Hey Abdul, I don’t think that is possible. You need to set this at the time of creating the connection.