If you want to send fancier notifications to Teams and struggle with Adaptive Cards, you can now use (in preview) Cards for Power Apps to generate your cards and send them in Teams chats.
Cards for Power Apps provides a straightforward experience to create Adaptive Cards that can easily be used on Teams chats.
In this post, we’ll see an example of how you can send use Power Automate to send a Power Apps card in Teams based on when a new item is added in a SharePoint list.
Creating a Card prepared to work in a Flow
Note: For Cards to work in a Flow, the Power Apps Teams app has to be installed in the chat, group chat, or channel that the card will be sent to.
To start creating a new card, head to the maker Portal and find the ‘Cards’ option in the left-hand side menu, and click ‘Create a card’ or ‘New card’:
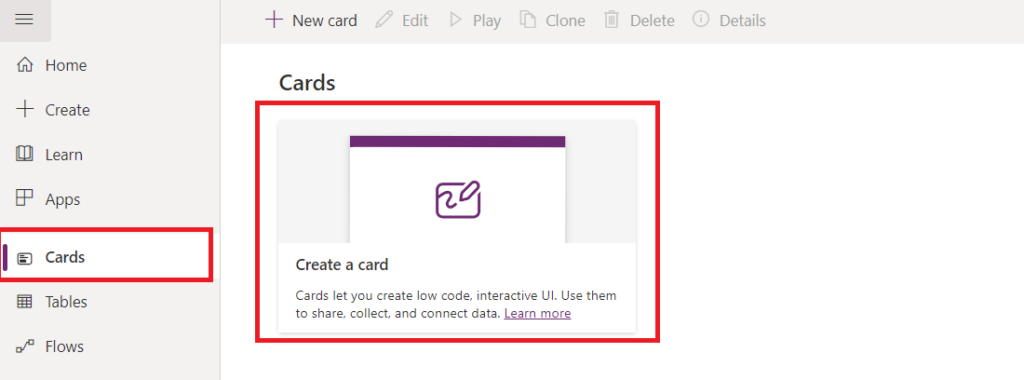
Give your card a name and a description and you are good to start.
Variables to handle inputs from Power Automate
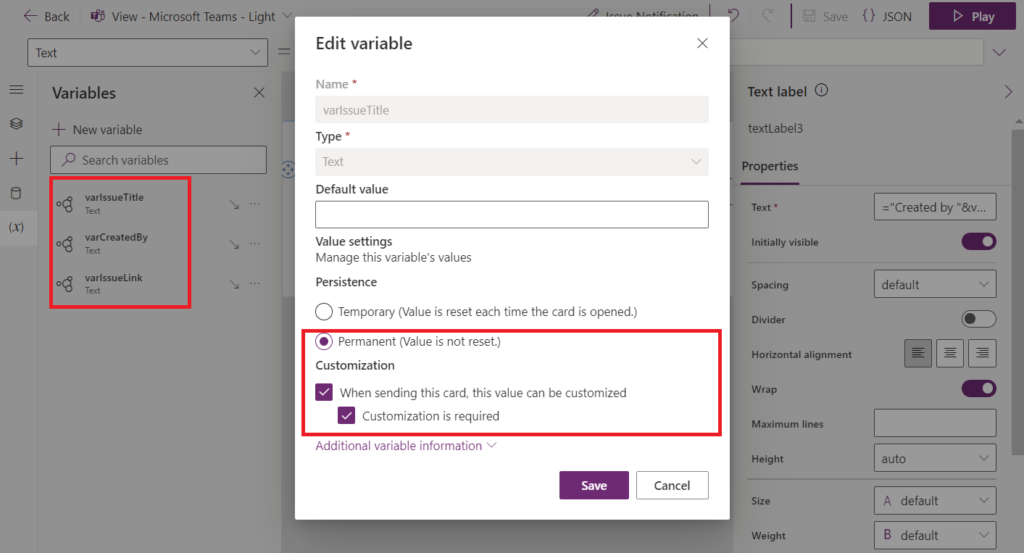
To be able to send information to the card, we need to create some variables and enable them as parameters. In this example we need 3 text variables:
- varIssueTitle
- varCreatedBy
- varIssueLink
Create the 3 of them as permanent, and below ‘Customization’, mark the 2 options:
- When sending this card, this value can be customized
- Customization is required
Using variables in the card
The card example is very simple, add 2 labels to the card.
In the first one reference the varIssueTitle variable directly:
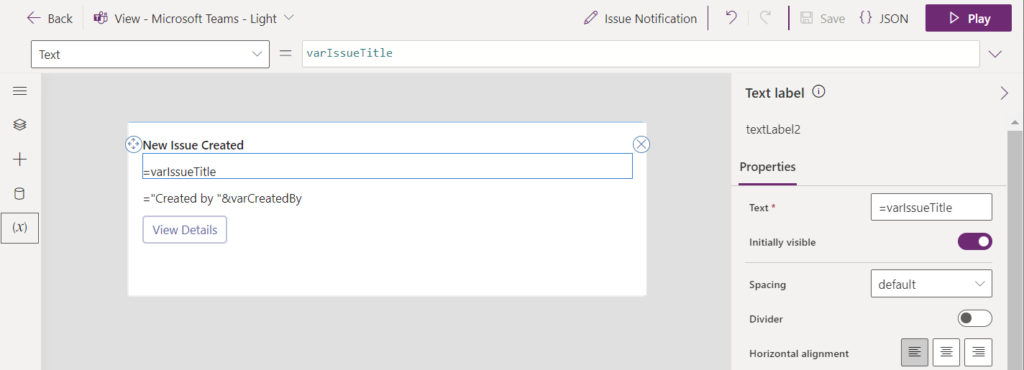
In the second one, use String concatenation with the variable varIssueTitle to generate a string in the format ‘Created by <User Name>’
"Created by "&varCreatedBy
In the button, we’ll send the link to the item from Power Automate, so simply set the button type to ‘Open Url’ and set the URL as the variable varIssueLink:

Creating the Power Automate Flow
The Power Automate flow is a pretty basic one. Given that you have a SharePoint list already created using the template ‘Issue Tracker’, create a new Flow with the SharePoint trigger ‘When an item is Created’. As best practice, add a second SharePoint action ‘Get item’ and retrieve data from the list using it. This is useful in case the trigger needs to be changed in any way in the future.
The third action needs to be ‘Create Card instance’, that you find under the Cards for Power Apps connector, so you can instantiate the card created earlier with parameters. Use the outputs from the ‘Get item’ action as parameters in this action.
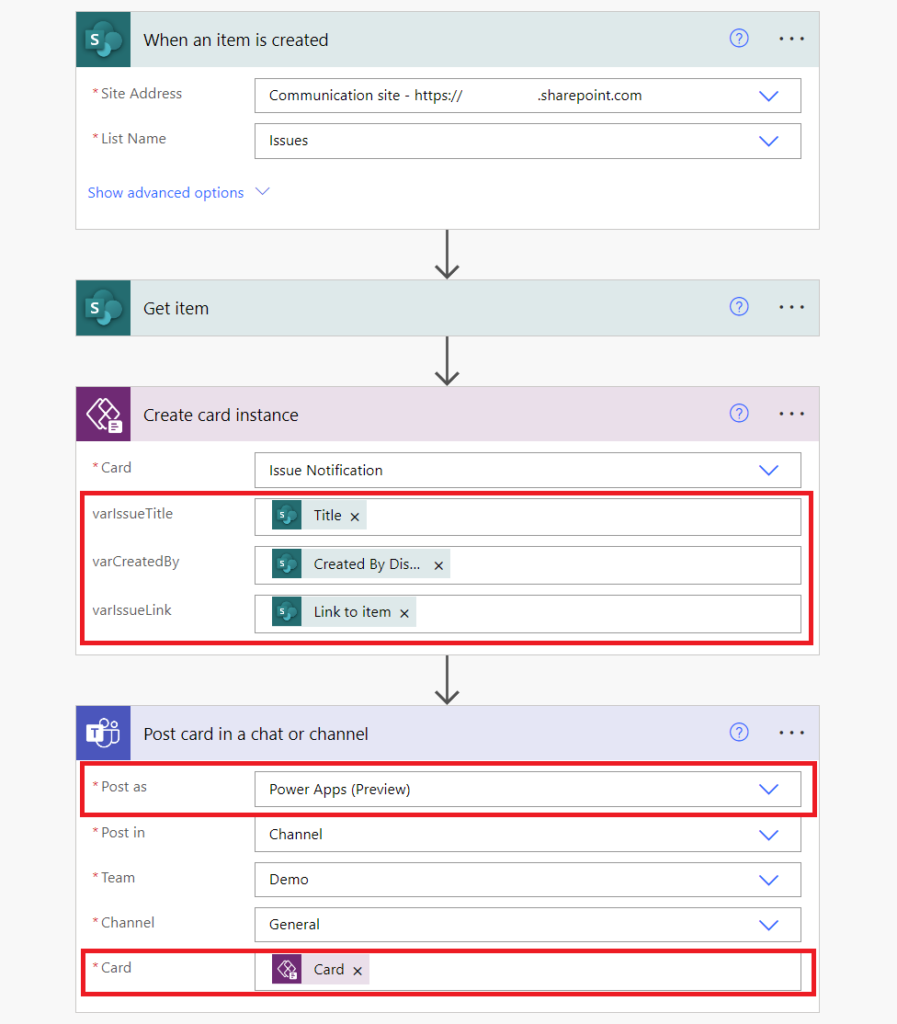
Lastly, you can use the same ‘Post card in a chat or channel’ action that you normally use for Adaptive Cards. Change ‘Post as’ to be ‘Power Apps (preview)’, and send the output of the ‘Create card instance’ action as the card.
Results
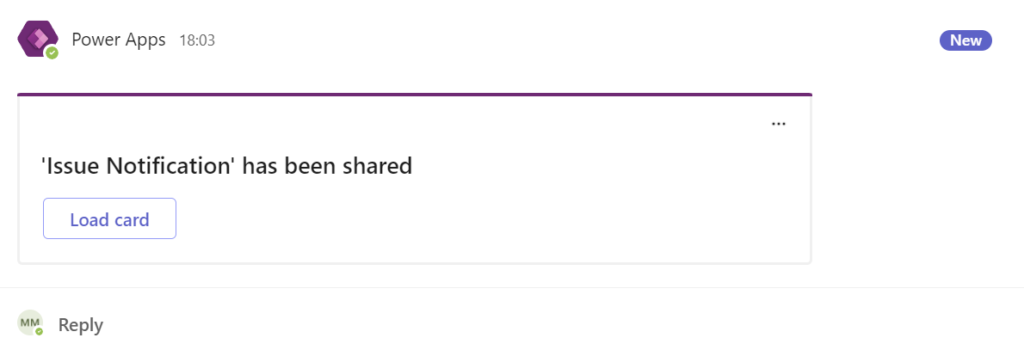
After the Flow is saved and a new item is added into the SharePoint list, the notification will be sent into Teams as configured (there might be the need of clicking ‘Load Card’ on the first time it appears):
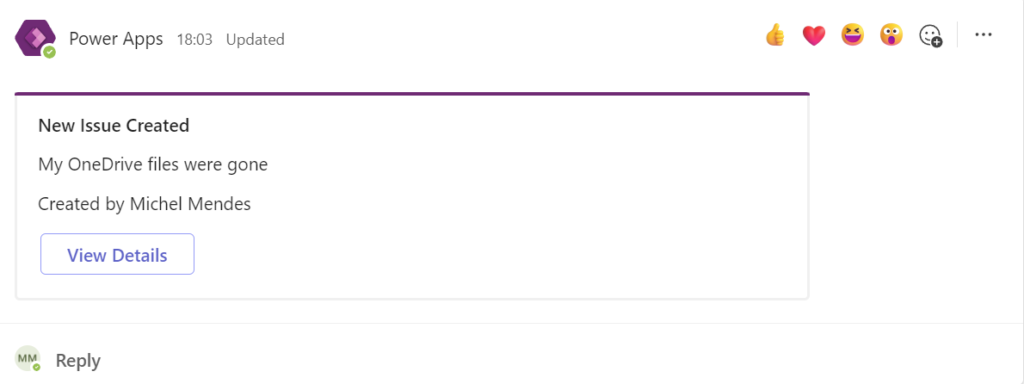
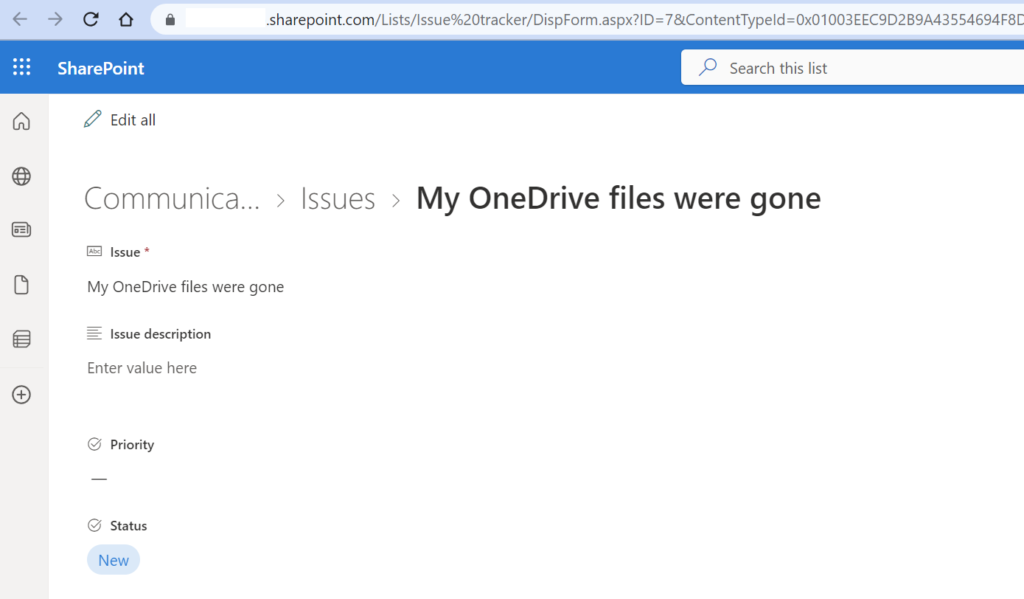
When clicking on ‘View Details’, the correct SharePoint list item will be opened:
Reference: Send a card automatically with a flow (Microsoft Learn)

[…] Source link […]
Thank you for a very nice guide!
Do you know if there is any way to get rid of the “load card” thing? The cards are useless if every user in a channel have to press the load card button to see that someone else already handled the card!
Thanks
Thanks for the feedback!
I just tested this functionality again, it is loading all cards automatically for me, even for new cards. Previously we needed to click the load button every time the card was shared/loaded.
Is there any specific scenario where this happens to you?
[…] Using Power Automate to send cards built with Cards for Power Apps in Teams […]